It would be presumptuous to claim much lived experience in the area of photographing gravel cycling races, yet each passing event provides a few lessons that improve my ability to arrive at the place I need to be at the time I’m supposed to be there. To organize my thoughts before an upcoming event, I thought I’d share the strategies I’ve established thus far.
An important characteristic of American gravel events from a photography standpoint is that, rather than traversing mountainous terrain with few throughways in the style of a European road race, the course typically forms a loop made up of gravel lanes bisected by numerous paved roads and state highways, so while it’s difficult to drive over the course much faster than the quickest riders themselves, especially when trying to pass them on narrow dirt roads, these highways serve as quick transportation between various photo spots along the way.
Assuming an average speed of 20mph for the front group, one can travel to three or four locations on a shorter course (with time to set up between) without covering riders in road dust.
Here are three representative courses. All are in different parts of the country, but follow the same basic pattern:
Bull Grind: A shorter event outside Austin, TX – https://ridewithgps.com/routes/33124238
Dirty Kanza 2018: One of the largest gravel races in the US (now called Unbound). Emporia, KS – https://ridewithgps.com/trips/23860354
Barry Roubaix 2018: A popular even in northern Michigan – https://ridewithgps.com/trips/22333636
Planning
For high-level professional work, I suppose a dedicated GPS with pre-programmed points would be ideal for navigating an event. In my case, I’m simply using a phone and Google Maps. Are you familiar with Google’s My Maps product?
My Maps allows you to upload and annotate course .gpx files and then navigate to points along that route. If a course has, say, 30, 60 and 90 mile events, each can be uploaded and simultaneously displayed to determine where the courses diverge. My hope is to take photos at three or more points: One that catches all three groups, two that the mid-distance group will cross, and one final point that will only see the main event, plus the finish. Even if the front group is missed at the finish, it’s easy to poach stragglers once you finally make it back to the starting point.
Planning on desktop:
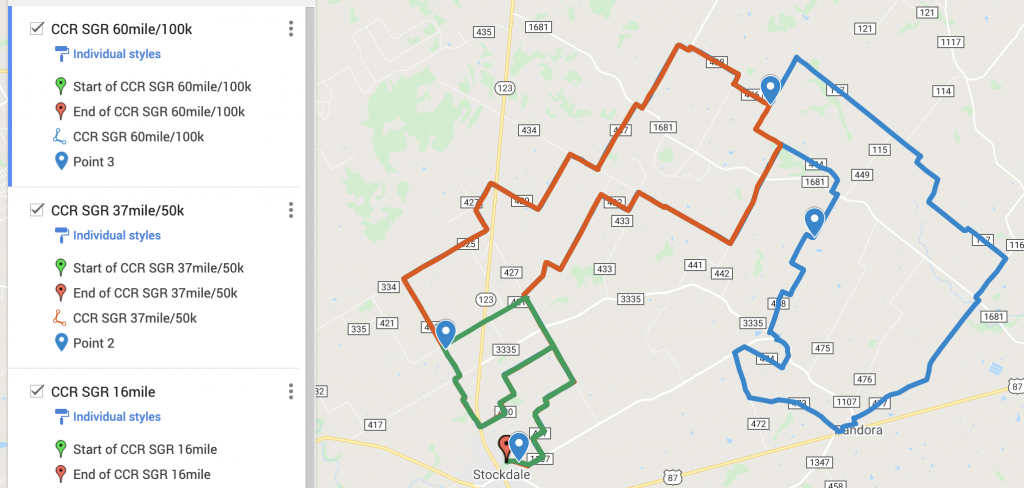
Unfortunately, My Maps doesn’t include Street View, which is an important part of selecting the most attractive spots if you won’t be pre-riding or driving the course. My solution is to keep the course open in RideWithGPS.com, where changing the map style from “RWGPS” to “Map” will enable the draggable Google Street View marker (though many of these remote roads won’t have Street View available). Alternatively, creating a point in My Maps and copy-pasting its coordinates to Google Maps also works.
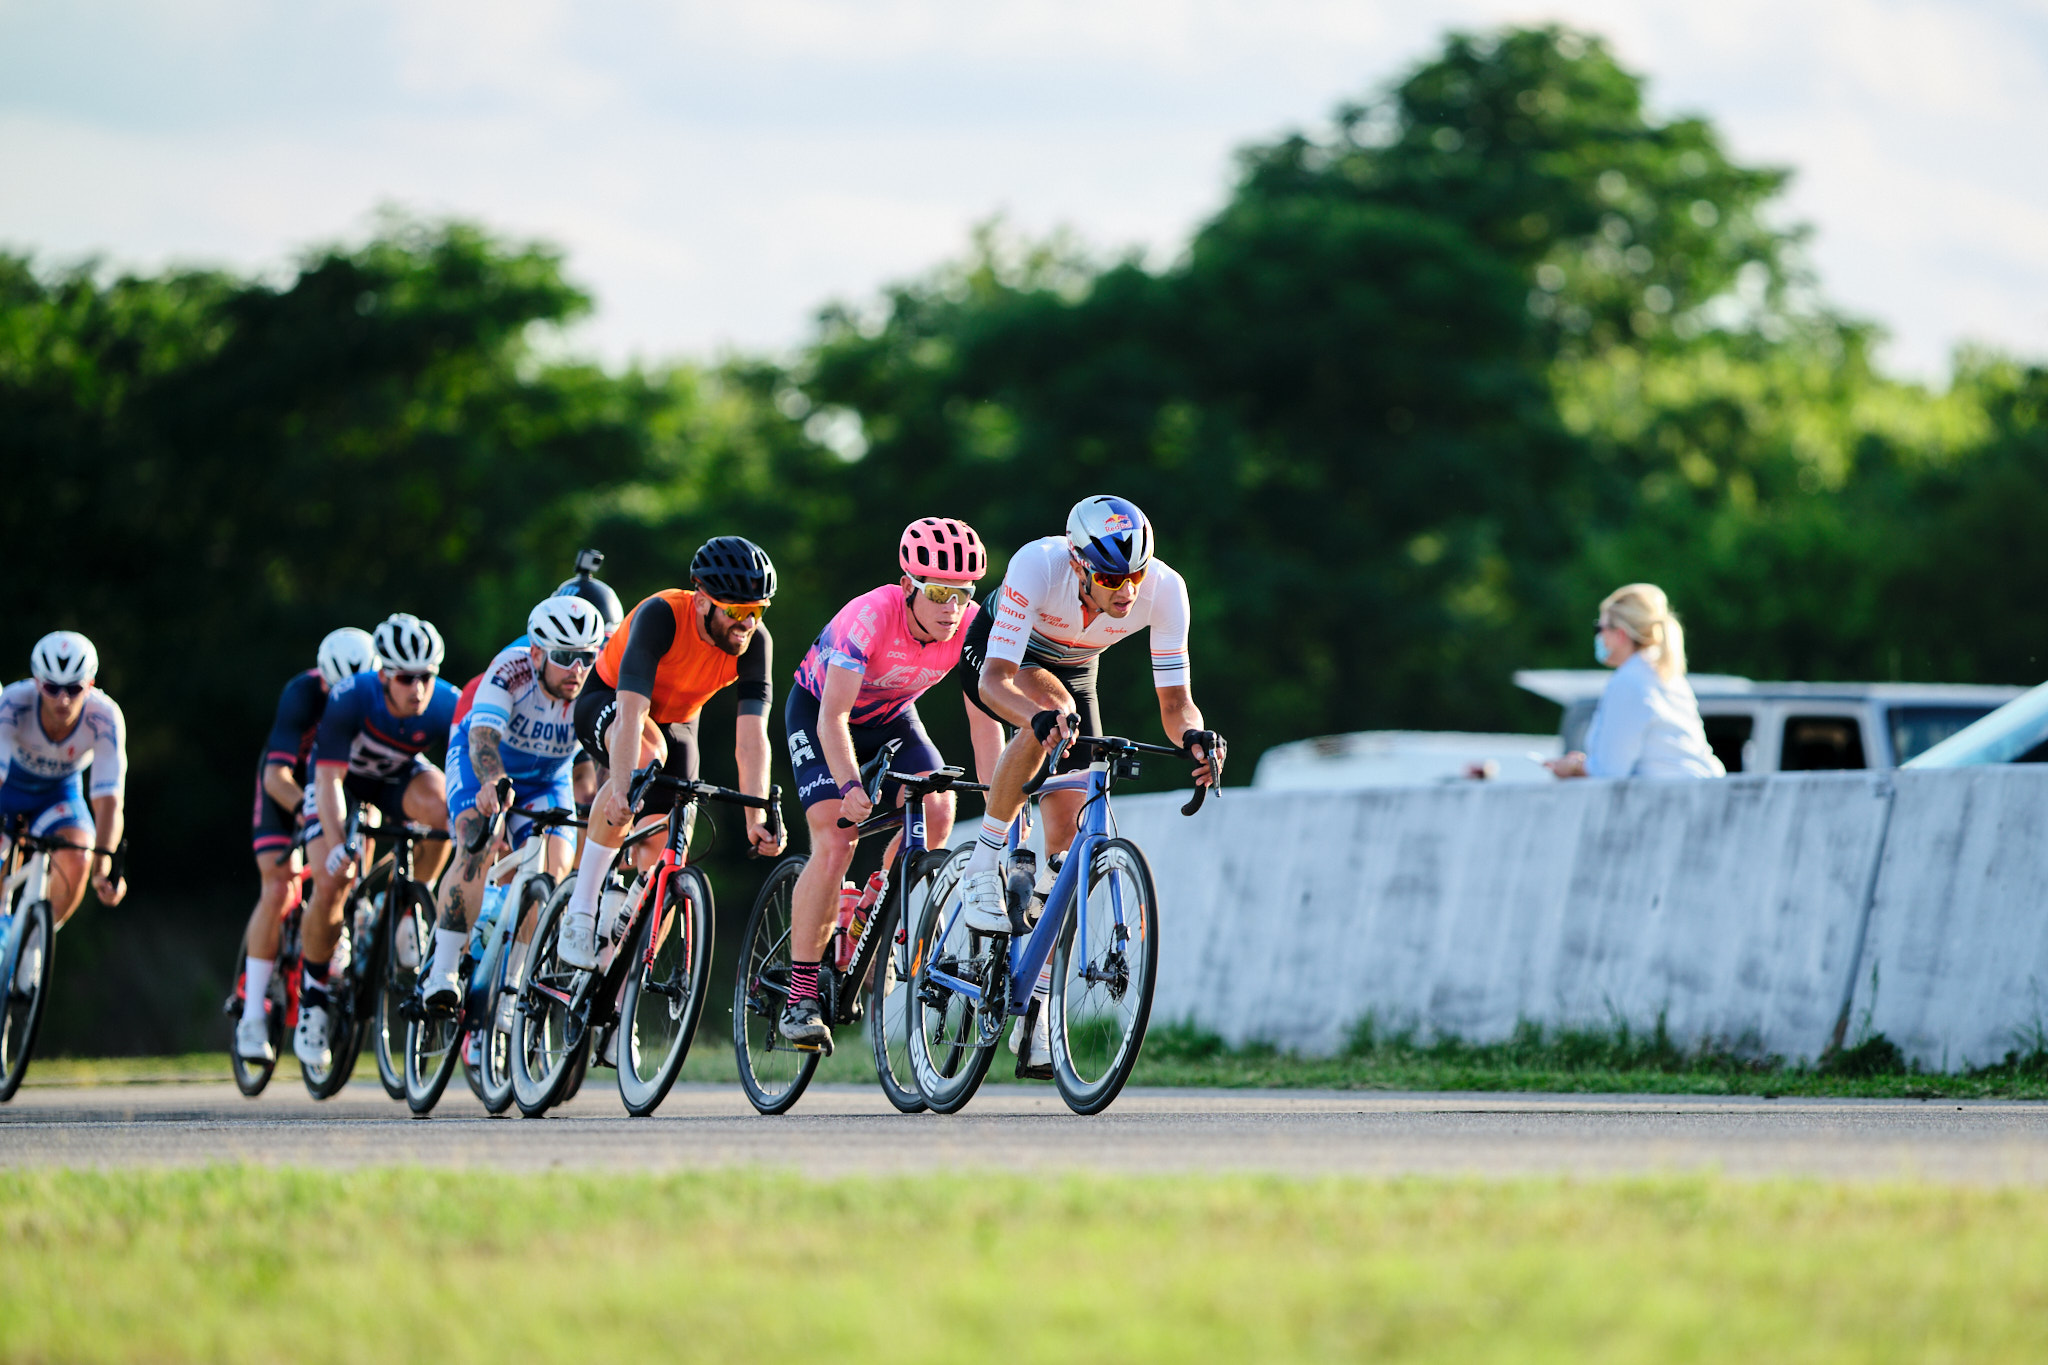
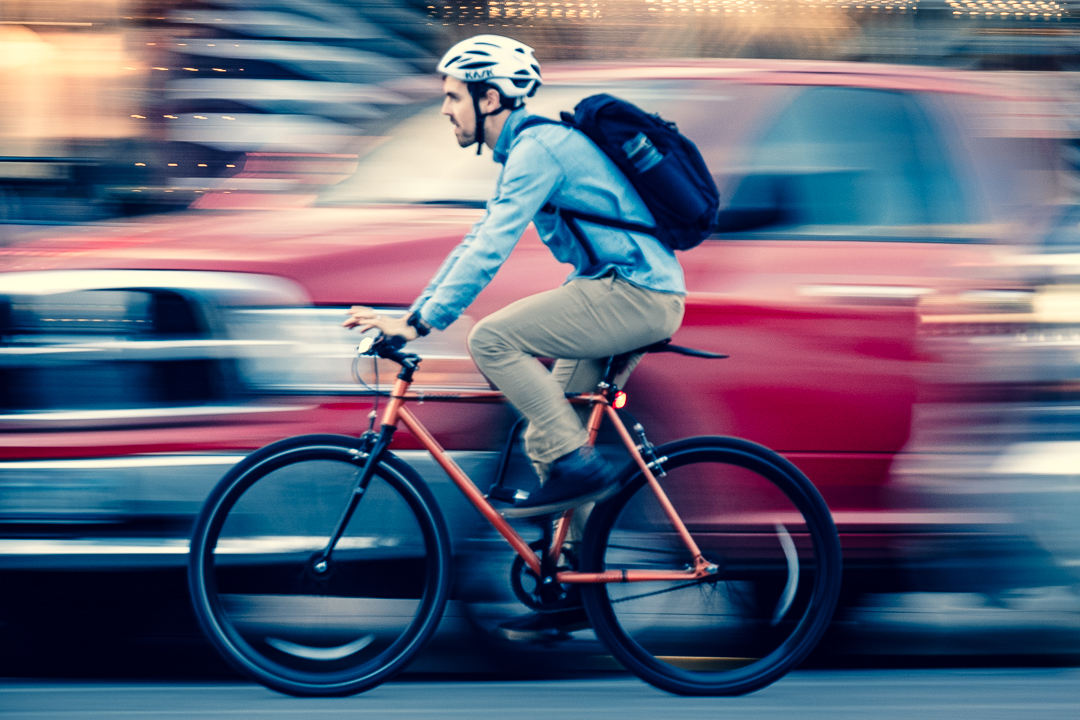
I look for hills, curves, beautiful countryside and, of course, gravel. Riders want to be photographed looking like Colin Strickland and not Team Ineos.
Timing
Average speeds vary widely in an open gravel event. Unlike road races, where licensed riders are participating in their designated categories and traveling in a fairly compact group, gravel events are fondo-style, with both “racers” and “riders” in the same event. Remember those math puzzles from your SATs: “If two trains leave the station at…”. Who’d have thought you’d ever actually use that stuff? Well, it’s helpful here.
With a big speed gap, the first and last riders can already be 20 minutes apart only ten miles into the race and, when that final rider passes, the front group will already be 7 miles up the road, which could be almost half way to your next point — a 20 minute drive. Timing is important.
The first point along the course should be relatively close to the start if you hope to catch most of the field before moving on, perhaps ten miles in or less. If the race has a neutral roll out then you’re in luck, as this will slow things down a bit as you make your way out onto the course.
I use 20mph for the front group and around 12mph for the stragglers on the short route, and closer to 14-15mph for the mid-pack riders on the longer courses. This isn’t perfect and varies with terrain and gravel-chunkiness, of course, but uses time efficiently. The reality is that you can’t wait for everyone. I’ll figure out the spread between the front and rear of the field and write down estimated times, and then update them with actual times and speeds as the event progresses. Even made a spreadsheet for it:
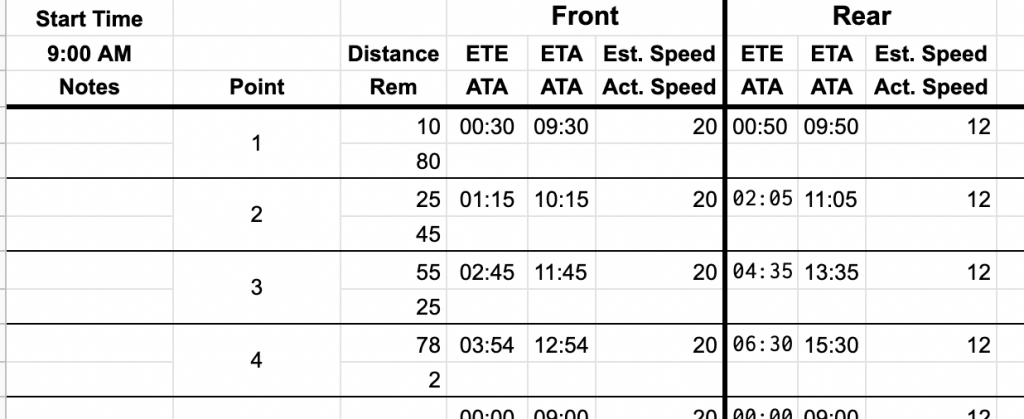
Realistically, the wait time will increase over the duration of the event unless you’ve got a compact course (or are a fast driver) and, eventually, the stragglers will be too far behind to wait. In the image above you can see that the last riders are crossing Point 3 well after the front group has reached Point 4. I have yet to devise a strategy for handling this over the massive distances of some gravel events, but maybe 2021 will present opportunities to experiment.
Positioning
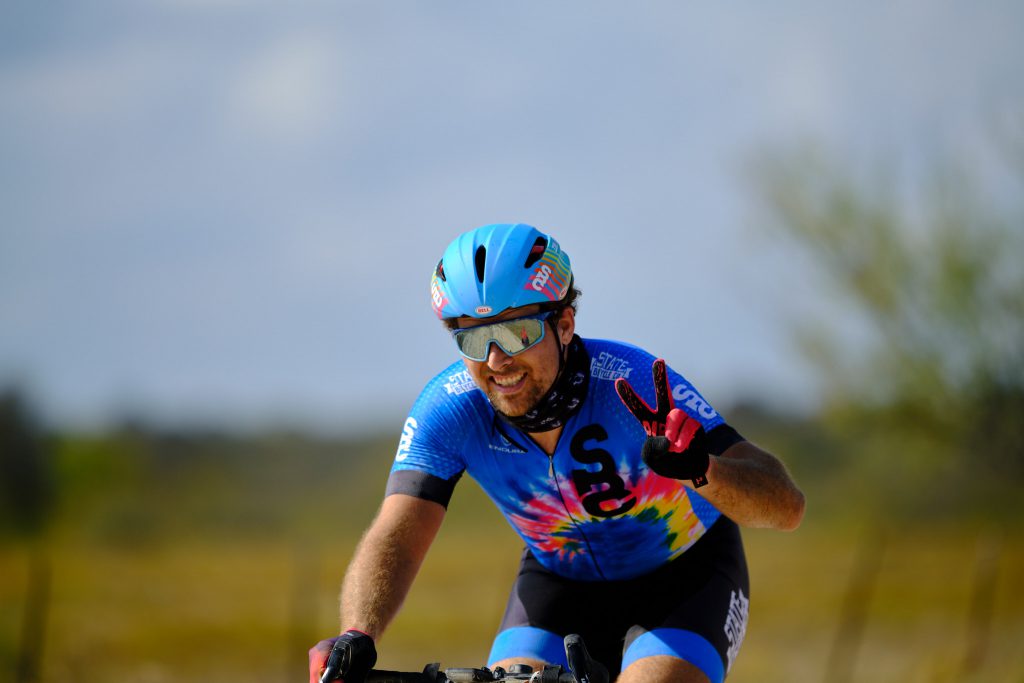
I certainly haven’t mastered the art of positioning myself for the greatest variety of shots. The top World Tour photographers do an incredible job here, and the diversity of their photos is amazing (see Jered Gruber’s work). Of course, their role is more that of documentarian, while I’m trying to get varied shots of as many participants as possible, which can subsequently be purchased for #lightbro use on the ‘gram.
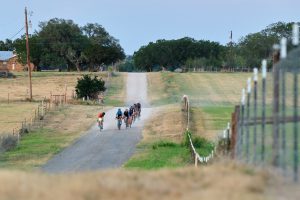
As previously mentioned, areas with hills, curves, beautiful countryside and gravel help create the money shot. The best spots present two completely different scenes in each direction. Even better if it’s also a place where riders double back after a loop. Curves are great because you can photograph the field in different settings with a short walk, or catch the added dynamism of riders taking curve.
These two photos were taken on opposite sides of a curve where riders were also doubling back:

Getting into position can be a little anxiety-inducing, as once “they’re off!” so are you. And if you don’t know what you’re doing, then you’re going to fail at the job you came to do. Have an idea of where to park for a fast escape after the start of the race, and DO NOT try to drive the course. You won’t be able to pass the mass of riders (ask me how I know).
After taking photos at the start, I’ll rush to my car to navigate to the first point. With the timing and points already worked out, this is easy. I simply open My Maps, choose the first point and drive.
Unpaved roads often also mean poor cell service, so I download the map area onto my phone ahead of the event.
Equipment
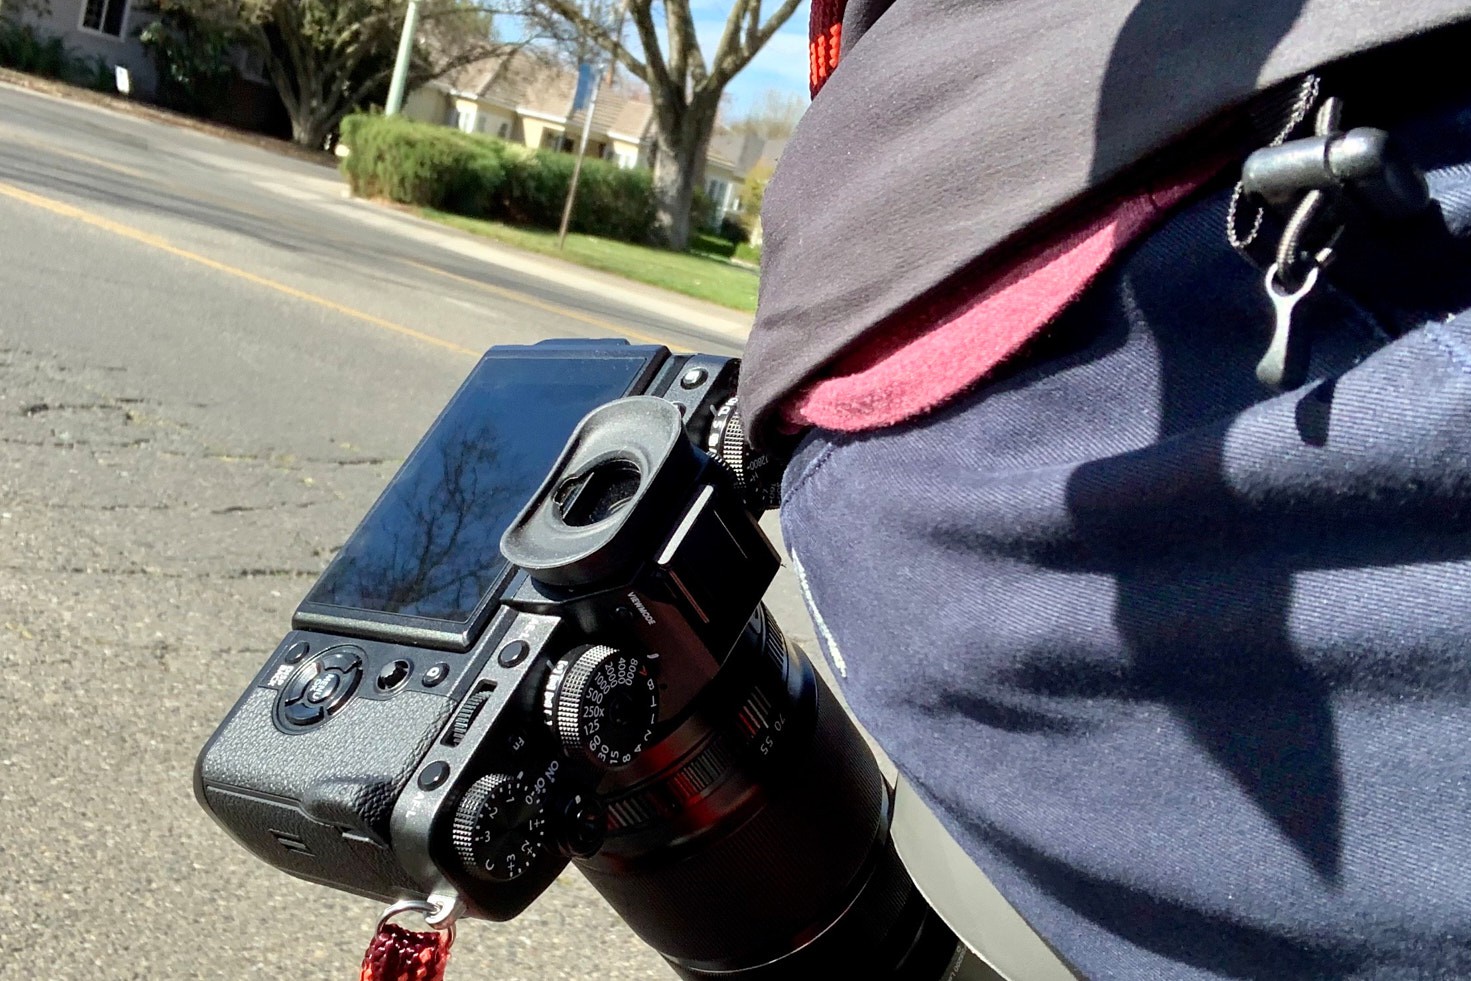
Though my current setup may change, I’m happy with the results I’m getting using my Fuji X-T3 with the 50-140mm (~70-200mm equivalent) f2.8 lens along with the 200mm (~300mm equivalent) f2 prime, which I rent (because it’s $6,000!).
Fujifilm cameras aren’t necessarily designed for sports, however, for the price, they’re an accessible tool for the job. The autofocus works well and with everything set up correctly my miss rate is relatively low. Some other features of this system are also great for sports:
- Pre-Shot AF – When pre-focusing on a subject, photos go into the buffer before the shutter is pressed. When the shot is taking, these “pre-shot” photos are saved to ensure you’ve captured the critical moment. Note: This only works using electronic shutter.
- 11fps with mechanical shutter. This is plenty fast for my purposes, as I’d rather not fill my card with thousands of throwaways. Still, with electronic shutter and a slight crop called “sports finder mode”, the camera can shoot up to 30fps.
- Cost. Sure, I’d love to have a Sony A9 or Canon 1DX for sports, but they’re expensive AF. Fuji offers a versatile system for a good price.
Settings:
Continuous autofocus (AF-C) is the tool designed for the job, and that’s what I’m usually using for action shots. Single (AF-S) can work well for slower moments or wider depths of field, and I appreciate the ability to recompose shots using AF-S. At f2 with a cyclist moving toward you, though, there’s no time to recompose as they’ll be out of focus almost instantly (see “Depth of field in front” with different numbers here). Different compositions can be achieved with AF-C by moving the focus point, but there’s no saying what framing will look best when the peloton comes through. For this reason, I usually just go for center-of-frame and crop later.
As to whether to use zone focus or not, it really depends on the situation. With bunches of riders, I prefer the single focus point for the ability to select individual riders in a bunch. Zone tends to jump around and sometimes feels like guesswork, and I much prefer the tighter control of selecting who’s in focus. On the other hand, zone works much better with individual riders as it’s more likely acquire focus and track the subject.
Another issue with zone focus is that if it locks to a rider’s shoulder, wheel, handlebar, etc., the face will be soft at an extremely shallow DoF. The Fuji 200 f2 is beautiful, but can be tough to work with when shooting wide open.
What AF-C custom settings are best using zone focus? I have no idea. I’ve experimented with preset 1 and 3, and currently have a custom setting of Tracking – 2, Speed Tracking – 1 (both the middle settings). I don’t rely on tracking much and, perhaps foolishly, attempt to command the camera to focus where and when I want it.
The use of electronic shutter is sometimes cautioned for action shots, as movement can cause a rolling shutter effect. I have yet to notice this in my action photos, and some of my best shots were taken with electronic shutter. In fact, the Pre-shot ES setting actually requires it. This setting keeps images in the buffer and then saves them once you press the shutter, effectively giving you 20 more captures before the decisive moment. This is significantly more frames than I want to sift through, so I typically leave it off except for the most critical shots.
Back Button Focus is another technique with which I’m experimenting and I plan to use at the next event. The AE-L button is set up for “AF on” as it’s easier to reach than AE-F, and I’ll leave the focus switch in Manual for the added benefit focus peaking.
One other relevant setting that I haven’t yet settled on is the use of ISO Auto. In variable lighting or when things are happening too fast to think about shutter speeds, ISO Auto can save you from trying to shoot a moving subject at something like 1/100. Unfortunately, the fastest minimum speed you can set on a Fuji camera is 1/500. I’d love to see this bumped up to 1/1000 or even higher.
Capture One
Though digital asset management isn’t its strong suit, Capture One is my preferred photo editor, in part, because I use the Fuji system (google “Lightroom worms”). After becoming comfortable with it, I’ll probably stay with Capture One regardless of my future file types, as the ability to use layers without leaving the program is powerful, and you simply can’t unsee the beautiful RAW rendering.
After an event, I’ll download the photos directly to C1 rather than culling with something like Photo Mechanic. I apply auto-correction to the photos during download, as I often purposely underexpose for faster shutter speeds. While some of my street photography is edited, I’ll often simply add Fuji’s Eterna Vivid 500T film simulation to the photos to brighten them up, and crop when necessary. An alternative might be to bump up the saturation a little in-camera or just shoot with Eterna, but I tend to enjoy starting from “zero” with RAWs to see what I ended up with.
Extras
Despite numerous “this event is unsupported” warnings, there are always a few riders who fail to heed the instruction. And, to be honest, I can understand it. After driving two hours to a highly anticipated event only to discover that I forgot my third bottle or a tire boot, I’d be just as tempted to take the course.
I’ve been asked for water and tubes on multiple occasions (and even a rag so a hero of a participant could wipe down the attachment point of his artificial leg before continuing on).
I bring a bunch of water bottles for “emergency use only”, my tool set and some tubes. Additionally, I make sure I know the course: “How far until…?”, “Left or right for the 60 milers?”, etc. are frequent requests.
Conclusion
Don’t take these words as the recommendations of a seasoned pro. I’m preserving my thoughts here for future review as I work to improve in 2021 (please let there be more events!). If it weren’t for camera equipment, I could probably afford a gravel bike and ride in these events instead of photographing them. Nevertheless, providing a service to the riders and being part of the race without all the pain (except editing) is an enjoyable alternative way to “do bikes” while indulging a second hobby.
Are Roadies Vapid?
Can you feel it? That pressure to whip out the smartphone…
I Bought a Car and Feel Terrible About It
If I'm honest with myself, embarrassment deserves partial…

2021?
Certainly, there will be more events, right? The only two…
Welcome to Austin, New Cyclist
One more feather in Austin’s cap, and a big reason I…
Driveway Returns
Bike racing is back! In Austin, at least. After two…
Review: Mettle Speed Strap
Some endeavor to document the ride itself, while others use…
Riding Under COVID-19
“Alone but together” - I feel like I’ve seen this phrase…
A Commuter
At first, it felt quite forced. The effort of going outside…
Bike for Your Country
Yes, for your country. While patriotic flags and sayings…